ຮັບເງິນ (v2)
ໝາຍເຫດສຳຄັນ: ບົດຄວາມນີ້ອ້າງອີງເຖິງ Ultimate Multisite version 2.x.
Ultimate Multisite ມີລະບົບການເປັນສະມາຊິກ ແລະ ການເກັບເງິນໃນຕົວຂອງມັນ. ເພື່ອໃຫ້ລະບົບການເກັບເງິນຂອງພວກເຮົາເຮັດວຽກໄດ້, ພວກເຮົາໄດ້ລວມເອົາ payment gateways (ປະຕູການຈ່າຍເງິນ) ທີ່ໃຊ້ທົ່ວໄປໃນ e-commerce ສ່ວນຫຼ�າຍ. Payment gateways ປົກກະຕິໃນ Ultimate Multisite ແມ່ນ Stripe , PayPal , ແລະ ການຈ່າຍເງິນແບບແຮງ (Manual Payment). ເຈົ້າສາມາດໃຊ້ WooCommerce , GoCardless ແລະ Payfast ເພື່ອຮັບການຈ່າຍເງິນໂດຍການຕິດຕັ້ງ add-ons ຂອງພວກມັນ.
ການຕັ້ງຄ່າພື້ນຖານ
ເຈົ້າສາມາດຕັ້ງຄ່າ payment gateway ໃດໆກໍໄດ້ພາຍໃຕ້ການຕັ້ງຄ່າການຈ່າຍເງິນຂອງ Ultimate Multisite. ເຈົ້າສາມາດຊອກຫາໄດ້ໂດຍໄປທີ່ Ultimate Multisite menu > Settings > Payments.
ກ່ອນທີ່ຈະຕັ້ງຄ່າ payment gateway ຂອງເຈົ້າ, ກະລຸນາເບິ່ງການຕັ້ງຄ່າພື້ນຖານທີ່ເຈົ້າສາມາດຕັ້ງຄ່າໄດ້:
Force auto-rene w: ອັນນີ້ຈະຮັບປະກັນວ່າການຈ່າຍເງິນຈະຕໍ່ອັດຕະໂນມັດໃນທ້າຍວົງຈອນການເກັບເງິນ ໂດຍອີງຕາມຄວາມຖີ່ຂອງການເກັບເງິນທີ່ຜູ້ໃຊ້ເລືອກ.
Ultimate Multisite v2.13.0 ຈະກວດສອບວ່າ gateway ທີ່ກຳລັງໃຊ້ຢູ່ມີ renewal credential (ຄຸນສົມບັດການຕໍ່ອາຍຸໃໝ່) ທີ່ສາມາດນຳກັບມາໃຊ້ໄດ້ ຫຼື ບໍ່ ກ່ອນທີ່ຈະບັນທຶກສະມາຊິກແບບເປັນປະຈຳທີ່ມີ auto-renewal ເປີດໃຊ້. Renewal credential ອາດເປັນການສະໝັກໃຊ້ gateway, ຂໍ້ຕົກລົງການເກັບເງິນ, vault token ທີ່ບັນທຶກໄວ້ ຫຼື ວິທີການຈ່າຍເງິນທີ່ສາມາດນຳກັບມາໃຊ້ໃໝ່ໄດ້. ຖ້າ gateway ລາຍງານວ່າບໍ່ມີ credential ໃດທີ່ໃຊ້ໄດ້, Ultimate Multisite ຈະບັນທຶກສະມາຊິກແຕ່ປິດ auto-renewal ແລະ ບັນທຶກສະຖານະທີ່ມີ missing-credential ເພື່ອໃຫ້ຜູ້ບໍລິຫານ ຫຼື support flow ສາມາດຂໍໃຫ້ລູກຄ້າອະນຸຍາດການຈ່າຍເງິນໃໝ່ກ່ອນວັນຕໍ່ອາຍຸ.
Thawm tsis tsoom membership ua auto-renew: Yuav tsis tsoom membership ua auto-renew tha gateway yuav tsuj tsoom tsoom payment (one-time payments) u bus. Gateway add-ons yuav tsuj tsoom confirm ti recurring checkouts yuav tsuj tsoom store reusable credential, especially ha gateway yuav tsuj tsoom support both one-time capture le vaulted/subscription payment modes.
Tsoom trials tsis tsoom method: Hoj yuav tsuj option no enabled, client yuav tsis tsoom add any financial information during registration process. This yuav tsuj tsoom required once trial period expires.
Tsoom invoice ha payment confirmation: Hoj yuav tsuj option whether or not to send invoice after payment. Note that users yuav tsuj access to their payment history under subsite dashboard. This option tsis tsoom apply to Manual Gateway.
Scheme tsoom invoice numbering: Hoj, yuav tsuj select either payment reference code or sequential number scheme. If yuav tsuj choose use payment reference code for your invoices, yuav tsis tsoom configure anything. If yuav tsuj choose use sequential number scheme, yuav tsuj need configure the next invoice number (This number yuav tsuj use as invoice number for next invoice generated on system. It incremented by one every time new invoice created. Yuav tsuj change it le save it to reset invoice sequential number to specific value) le the invoice number prefix.
ໃສ່ລະບົບຮັບເງິນ (Gateways) ຢູ່ໃສ:
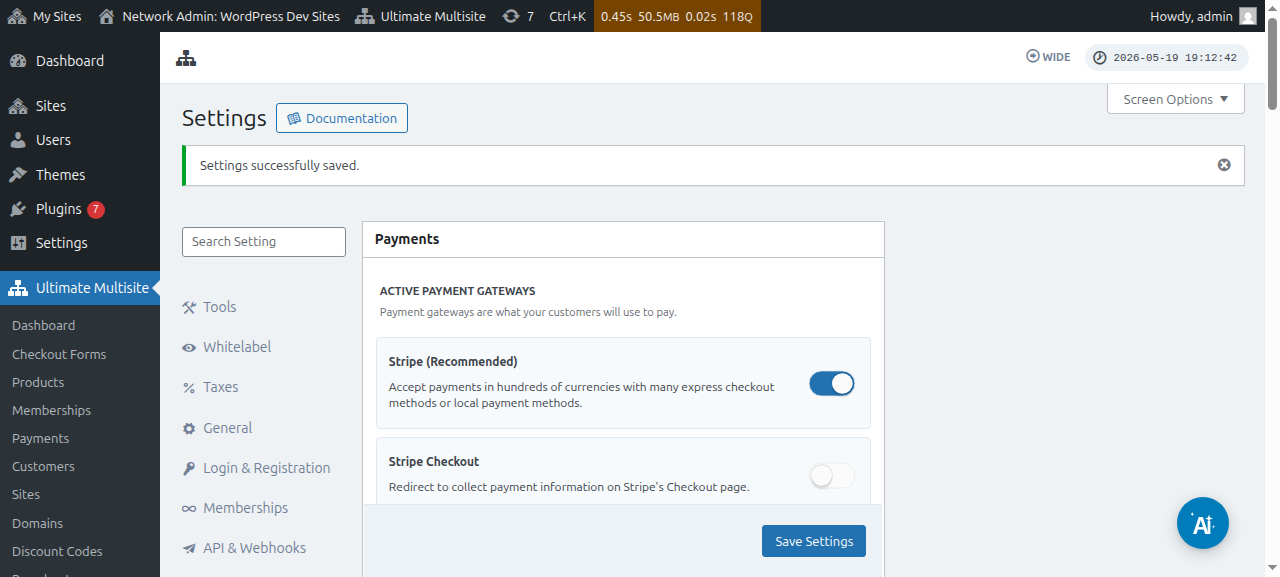
ເຈົ້າສາມາດຕັ້ງຄ່າ payment gateways ໃນໜ້າດຽວກັນໄດ້ເລີຍ (Ultimate Multisite > Settings > Payments). ຢູ່ລຸ່ມ active payment gateways ເຈົ້າຈະເຫັນ: Stripe , Stripe Checkout , PayPal ແລະ Manual.
ພວກເຮົາເຮັດບົດຄວາມສະເພາະສຳລັບ payment gateway ແຕ່ລະອັນ ເພື່ອແນະນຳຂັ້ນຕອນການຕັ້ງຄ່າໃຫ້ເຈົ້າ, ເຊິ່ງເຈົ້າສາມາດຊອກເຫັນໄດ້ໃນລິ້ງລຸ່ມນີ້.
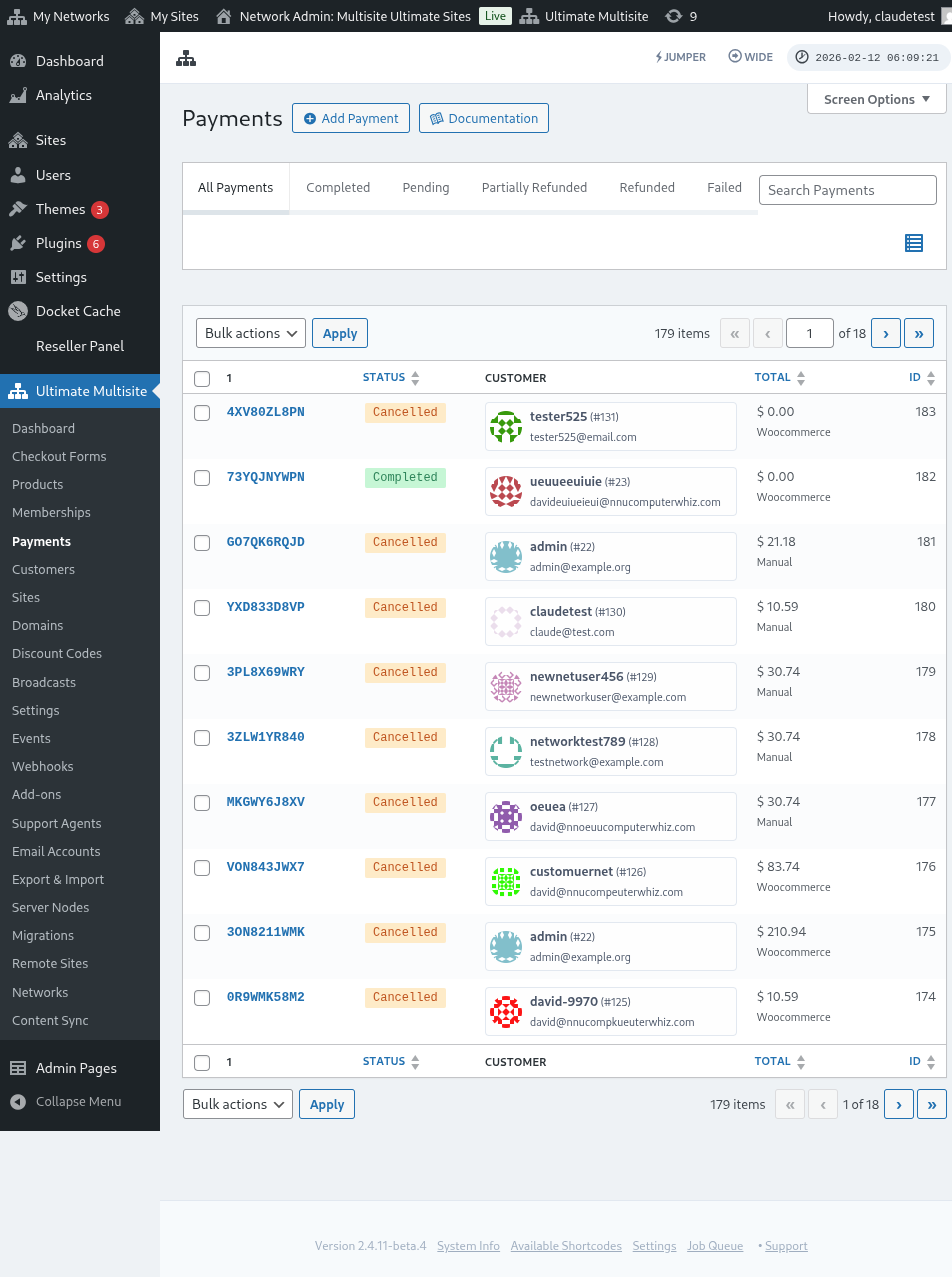
ເຈົ້າສາມາດເບິ່ງ ແລະ ແກ້ໄຂລາຍລະອຽດການຈ່າຍເງິນໄດ້:
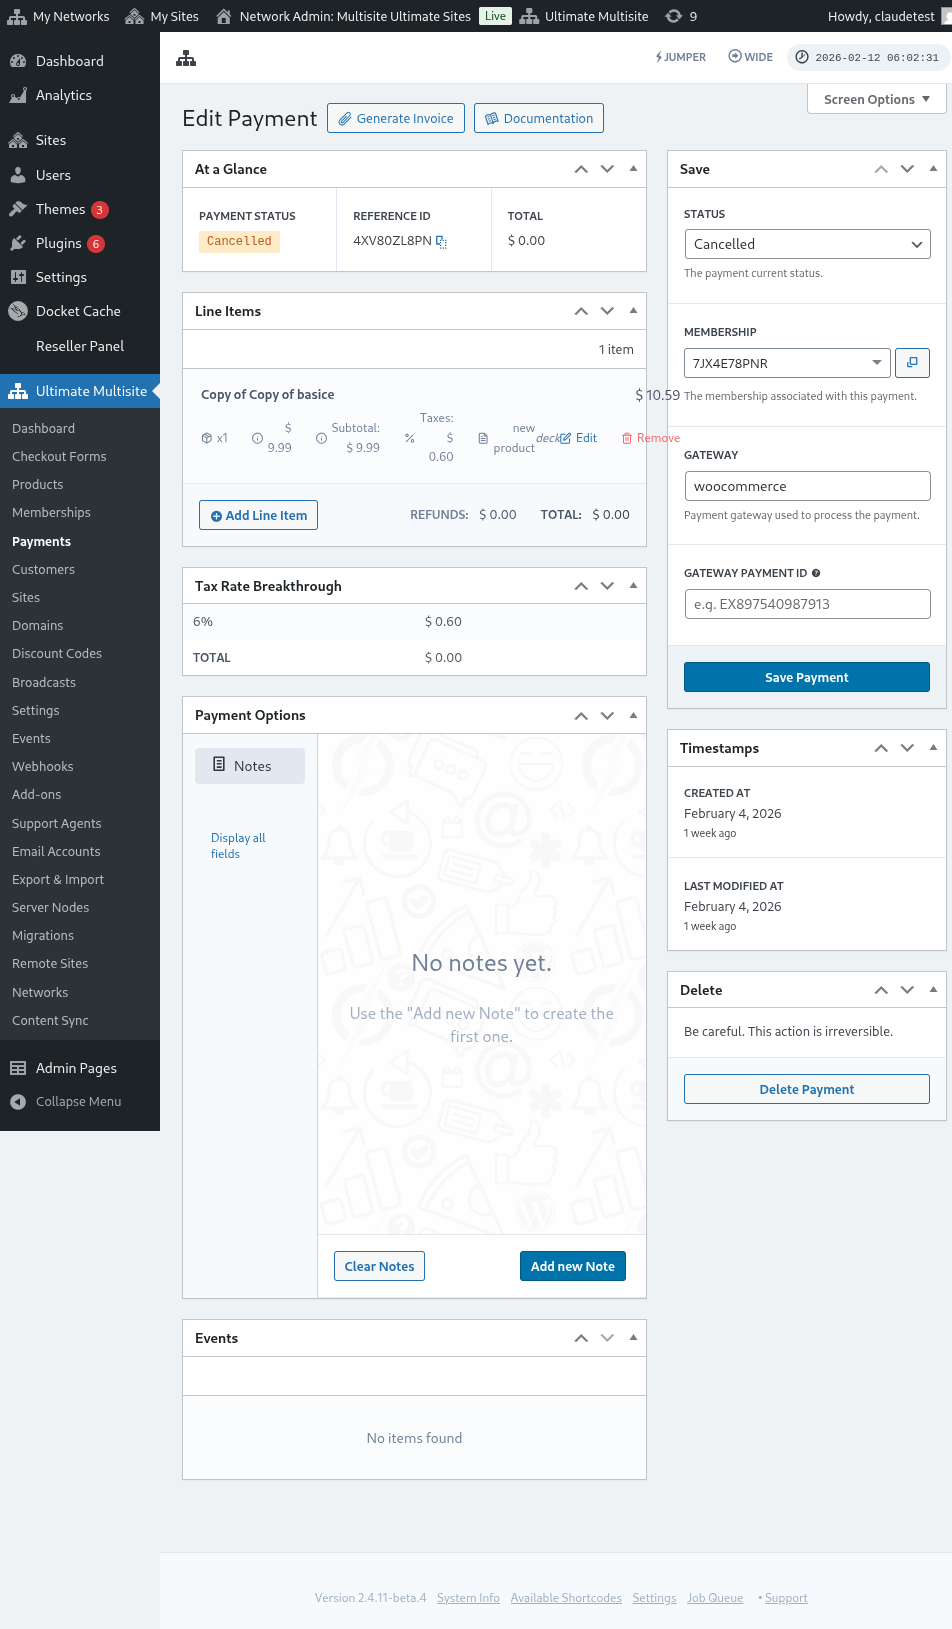
ນີ້ແມ່ນພາບເຕັມຂອງໜ້າແກ້ໄຂການຈ່າຍເງິນ:
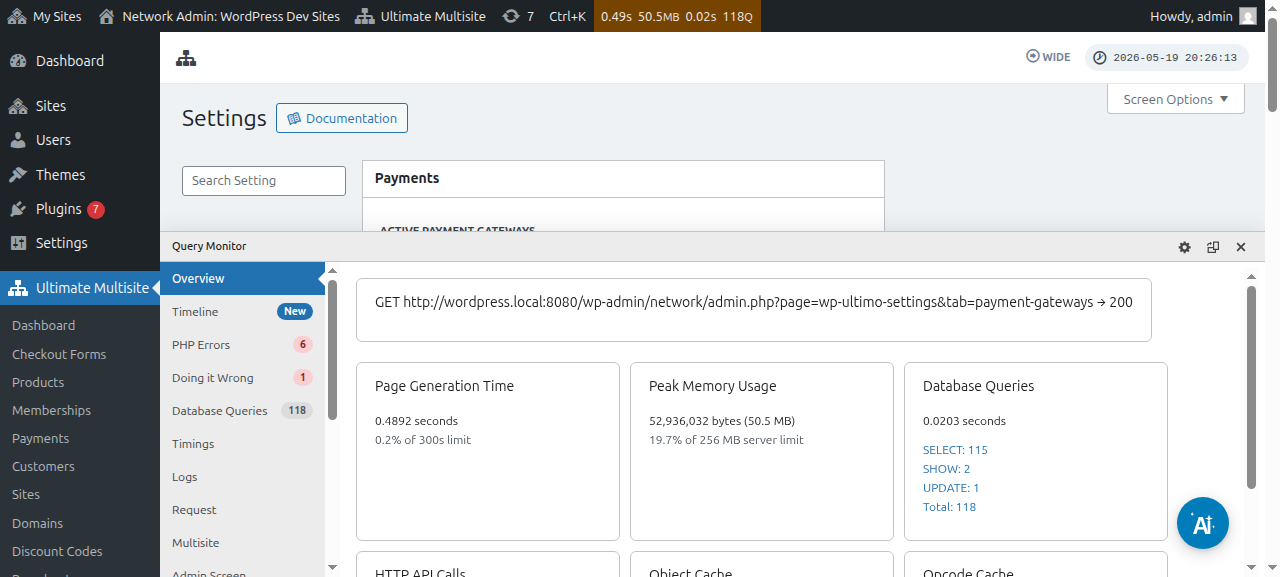
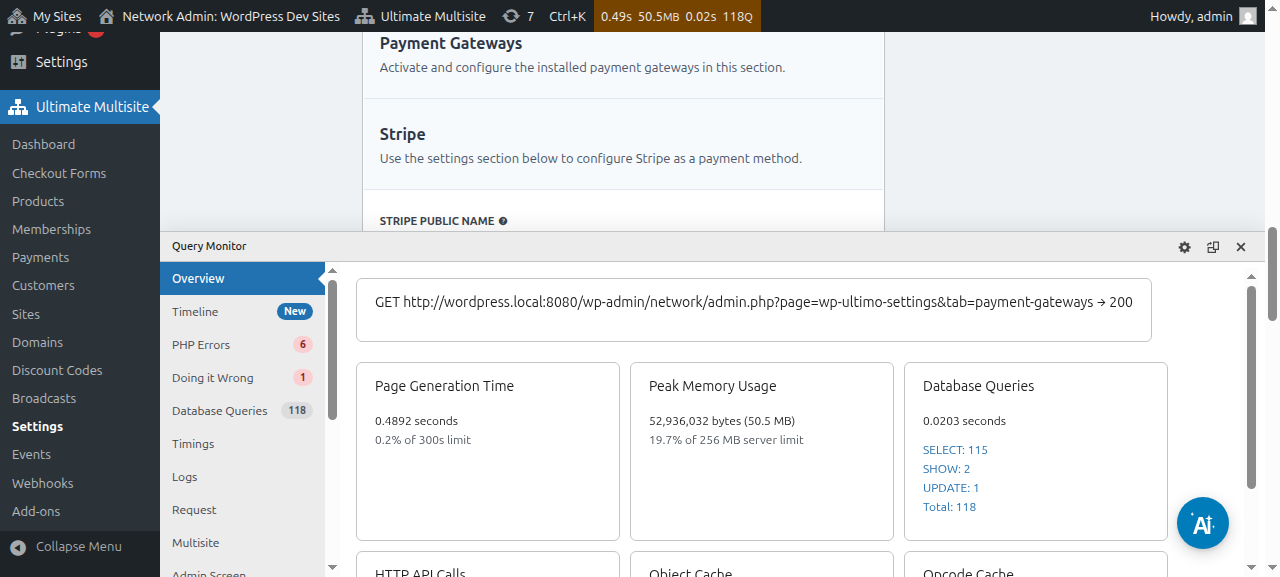
ນີ້ແມ່ນພາບເຕັມຂອງການຕັ້ງຄ່າ payment gateways ເທົ່ານັ້ນ:
ການຕັ້ງຄ່າ Stripe gateway
ການຕັ້ງຄ່າ PayPal gateway** **
ການຕັ້ງຄ່າການຈ່າຍເງິນແບບແລ້ວ (manual payments)
ດຽວນີ້, ຖ້າເຈົ້າຢາກໃຊ້ WooCommerce , GoCardless ຫຼື Payfast ເປັນ payment gateway ຂອງເຈົ້າ, ເຈົ້າຈະຕ້ອງ ຕິດຕັ້ງ ແລະ ຕັ້ງຄ່າ add-ons ຂອງພວກມັນ.
ວິທີຕິດຕັ້ງ WooCommerce add-on:
ພວກເຮົາເຂົ້າໃຈວ່າ Stripe ແລະ PayPal ບໍ່ມີຢູ່ໃນບາງປະເທດ ເຊິ່ງເຮັດໃຫ້ຜູ້ໃຊ້ Ultimate Multisite ມີຂໍ້ຈຳກັດ ຫຼື ຂັດຂວາງໃນການໃຊ້ plugin ຂອງພວກເຮົາຢ່າງມີປະສິດທິພາບ. ດັ່ງນັ້ນ, ພວກເຮົາຈຶ່ງໄດ້ສ້າງ add-on ເພື່ອເຊື່ອມຕໍ່ກັບ WooCommerce, ເຊິ່ງເປັນ plugin e-commerce ທີ່ໄດ້ຮັບຄວາມນິຍົມຫຼາຍ. ນັກພັດທະນາຢູ່ທົ່ວໂລກໄດ້ສ້າງ add-ons ເພື່ອເຊື່ອມຕໍ່ payment gateway ແຕກຕ່າງໆເຂົ້າກັບມັນ. ພວກເຮົາໄດ້ໃຊ້ໂອກາດນີ້ເພື່ອຂະຫຍາຍ payment gateways ທີ່ເຈົ້າສາມາດໃຊ້ກັບລະບົບການເກັບຄ່າທຳນຽມຂອງ Ultimate Multisite ໄດ້.
_IMPORTANT: Ultimate Multisite: WooCommerce Integration Ò chawm ua hauv WooCommerce ntseeb (activate) hais tus neeg tsis muaj hauv site tseem neeg.
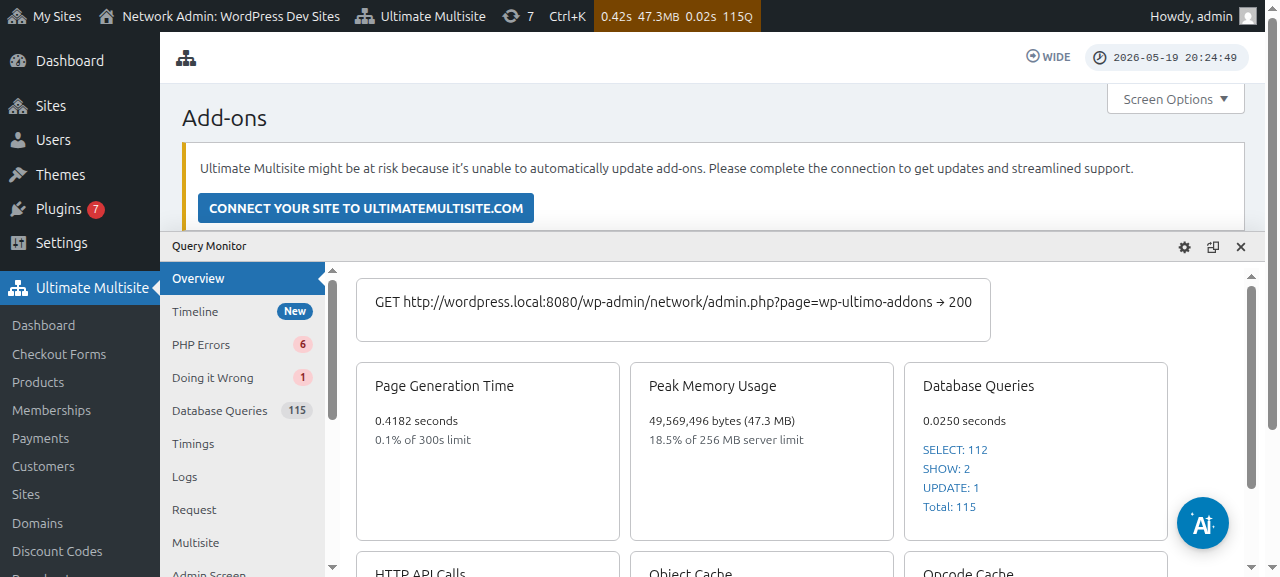
Tsis tas tam, thov yuav mus rau page add-ons. Yuav sivj hauv Ultimate Multisite > Settings. Kuv yuav paub table Add-ons. Thov hauv Check our Add-ons.
Thaum thov hauv Check our Add-ons , yuav yuav tsoom rau page add-ons. Hais tus, yuav paub add-ons txhua ntawm Ultimate Multisite. Thov hauv add-on Ultimate Multisite: WooCommerce Integration.
Kuv yuav muaj window tsoom rau details ntawm add-on. Tas thov hauv Install Now (Tshob hauv Install Now).
Thaum teeb loj tam tsis tas tam, yuav tsoom rau page plugins. Hais tus, thov hauv Network Activate thiab add-on WooCommerce yuav ntseeb (activate) hais tus neeg.
Thaum teeb loj tam, heev tsis tas tam, yuav muaj tab tom qhia rau koj tias yuav tsoom hais tus neeg ntseeb (install and activate) plugin WooCommerce hais tus neeg.
Thaum xav paub ntxiv txog add-on WooCommerce Integration, thov thov ntawm no.
Kuv yuav teeb tsis tas tam ib lub add-on GoCardless li cas:
ການຕິດຕັ້ງ add-on GoCardless ເປັນຂັ້ນຕອນທີ່ຄ້າຍຄືກັບ add-on WooCommerce. ໃຫ້ໄປທີ່ໜ້າ add-ons ແລ້ວເລືອກ add-on Ultimate Multisite: GoCardless Gateway.
ປ່ອງ add-on ຈະເປີດຂຶ້ນມາ. ກົດທີ່ Install Now (ຕິດຕັ້ງດຽວນີ້).
ຫຼັງຈາກຕິດຕັ້ງສຳເລັດແລ້ວ, ທ່ານຈະຖືກນໍາໄປທີ່ໜ້າ plugins (ເພີ່ມເຕີມ). ຢູ່ບ່ອນນີ້, ກົດທ�ີ່ Network Activate ແລ້ວ add-on GoCardless ກໍຈະເປີດໃຊ້ໃນ network ຂອງທ່ານ.
ເພື່ອຮຽນຮູ້ວິທີເລີ່ມຕົ້ນການໃຊ້ GoCardless gateway, ອ່ານບົດຄວາມນີ້.
ວິທີຕິດຕັ້ງ add-on Payfast:
ໄປທີ່ໜ້າ add-ons ແລ້ວເລືອກ add-on Ultimate Multisite: Payfast Gateway.
ປ່ອງ add-on ຈະເປີດຂຶ້ນມາ. ກົດທີ່ Install Now (ຕິດຕັ້ງດຽວນີ້).
ຫຼັງຈາກຕິດຕັ້ງສຳເລັດແລ້ວ, ທ່ານຈະຖືກນໍາໄປທີ່ໜ້າ plugins (ເພີ່ມເຕີມ). ຢູ່ບ່ອນນີ້, ກົດທີ່ Network Activate ແລ້ວ add-on Payfast ກໍຈະເປີດໃຊ້ໃນ network ຂອງທ່ານ.