Checkout Forms
Checkout Forms are an easy and flexible way to experiment with different approaches when trying to convert new customers.
Ultimate Multisite 2.0 offers a Checkout Form editor that allows you to create as many forms as you want, with different fields, products on offer, etc.
To access this feature, go to the Checkout Forms menu, on the left side-bar.

On this page, you can see all the checkout forms you have.
If you want to create a new one, just click Add Checkout Form on the top of the page.
You can select one of these three options as your starting point: single step, multi-step or blank. Then, click to Go to the Editor.
Alternatively, you can edit or duplicate the forms you already have by clicking on the options below its name. There, you will also find the options to copy the form's shortcode or to delete the form.

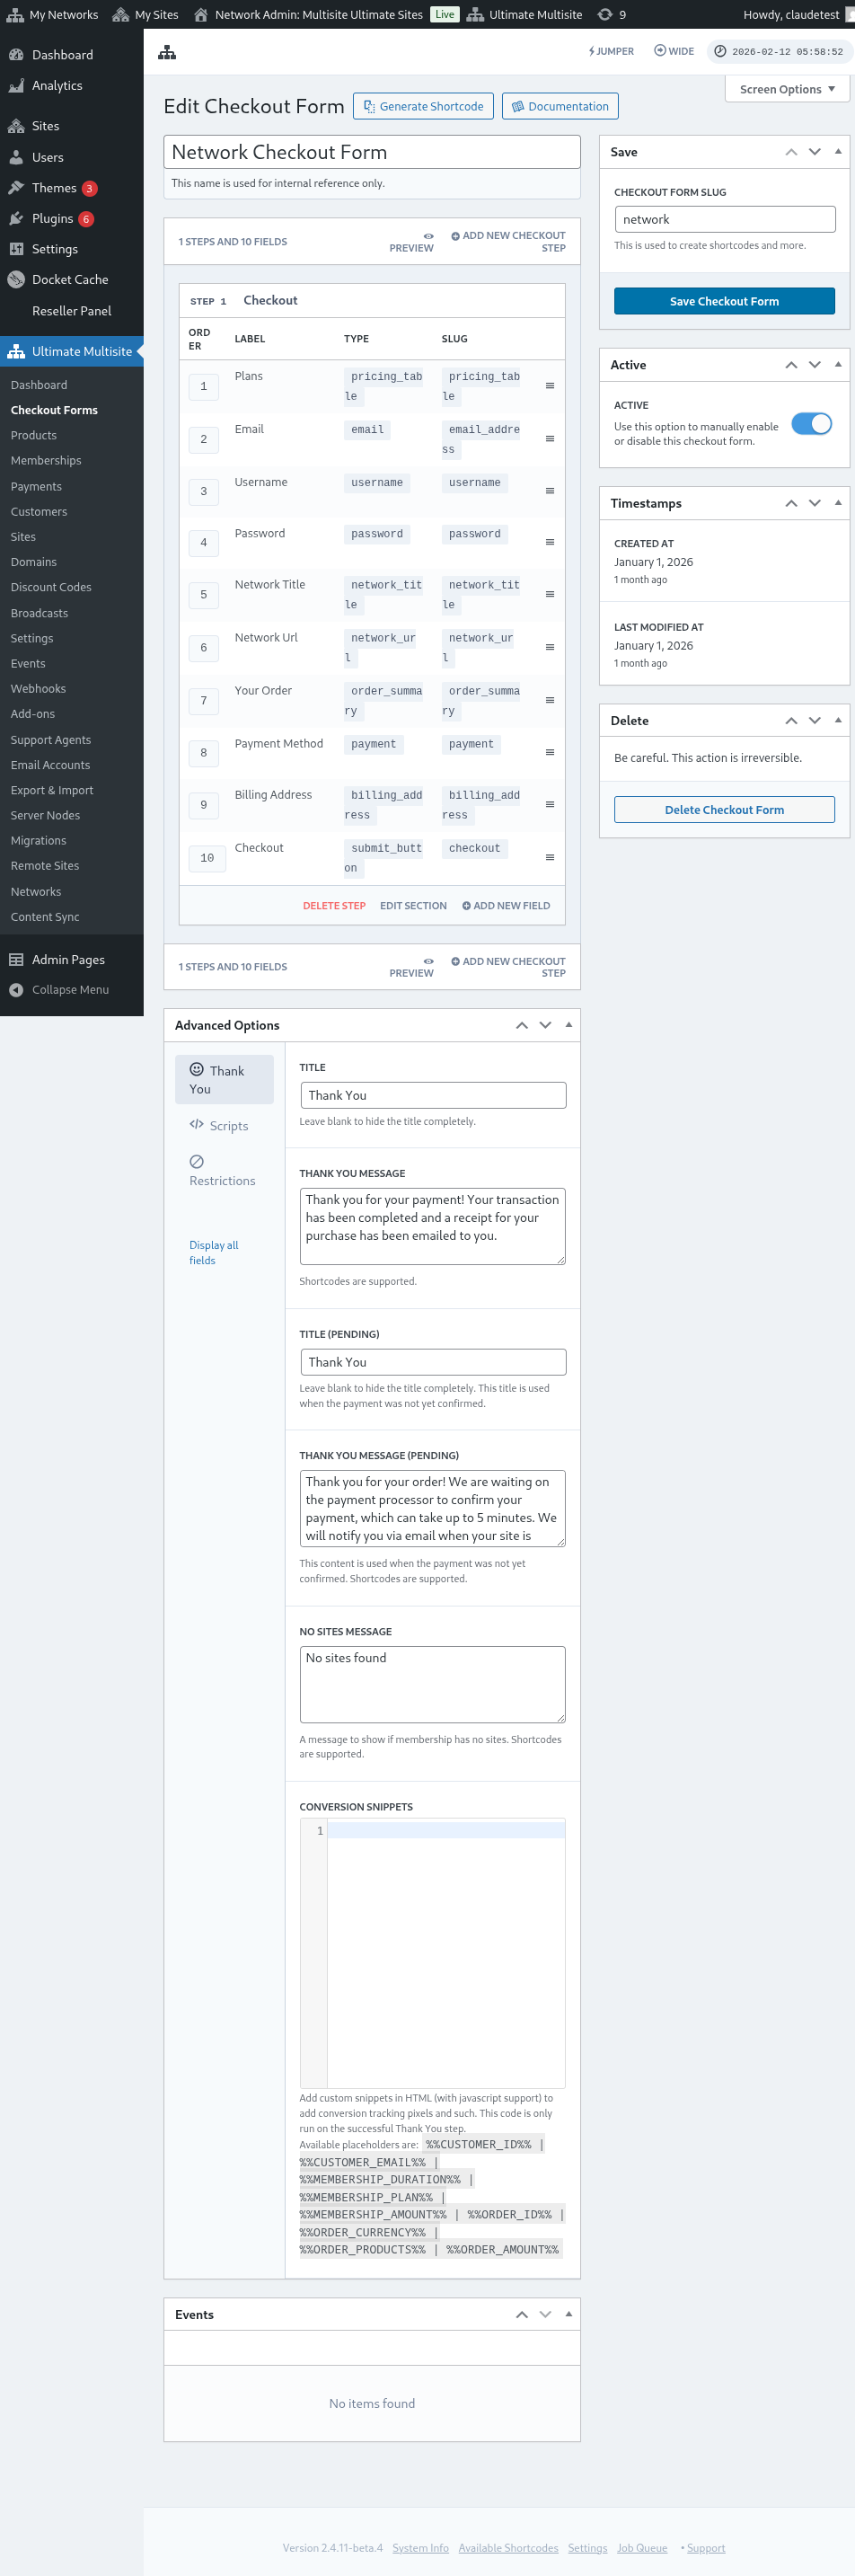
Editing a Checkout Form
You can create checkout forms for different purposes. In this example we will work on a registration form.
After navigating to the checkout form editor, give your form a name (that will be used for internal reference only) and a slug (used to create shortcakes, for example).
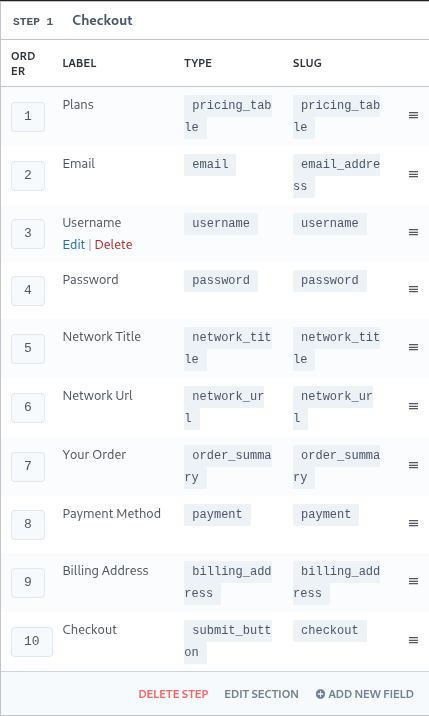
Forms are made of steps and fields. You can add a new step by clicking on Add New Checkout Step.

On the first tab of the modal window, fill the content of your form's step. Give it an ID, a name and a description. These items are mostly used internally.
Next, set the visibility of the step. You can choose between "Always show", "Only show for logged in users" or "Only show for guests".
Finally, configure the step style. These are optional fields.
Now, it's time to add fields to our first step. Just click to Add New Field and select the type of section you want.
Each field has different parameters to be filled. For this first entrance, we will select the "Username" field.
You can add as many steps and fields as you need. To display your products for your customers to pick one, use the Pricing Table field. If you want to let your clients choose a template, add the Template Selection field. And so on.
Note: username, email, password, site title, site URL, order summary, payment, and submit button are mandatory fields to create a checkout form.
While you are working on your checkout form, you can always use the Preview button to see how your clients will see the form. You can also alternate between view as an existing user or a visitor

Finally, on Advanced Options you can configure the message for the "Thank You" page, add snippets to track conversions, add custom CSS to your checkout form or restrict it to certain countries.

You can also manually enable or disable your checkout form by toggling this option on the right column, or delete permanently the form.

Don't forget to save your checkout form!
To get your form's shortcode click to Generate Shortcode and copy the result shown on the modal window.