Domain Mapping કેવી રીતે Configure કરવું (v2)
મહત્વની નોંધ: આ લેખ Ultimate Multisite version 2.x વિશે છે.
Premium network ની સૌથી શક્તિશાળી features માંથી એક છે આપણા clients ને તેમની sites સાથે top-level domain જોડવાની તક આપવી. છેવટે, કયું વધુ professional લાગે છે: joesbikeshop.yournetwork.com કે joesbikeshop.com? એટલા માટે Ultimate Multisite આ feature built-in આપે છે, third-party plugins વાપરવાની જરૂર વગર.
Domain mapping શું છે?
નામ પ્રમાણે, domain mapping એ Ultimate Multisite દ્વારા આપવામાં આવતી સુવિધા છે જે custom domain માટેની request લે છે અને તે request ને network માં તે particular domain જોડાયેલી corresponding site સાથે map કરે છે.
તમારા Ultimate Multisite Network પર domain mapping કેવી રીતે setup કરવું
Domain mapping કામ કરવા માટે તમારે થોડું setting up કરવું પડશે. સદભાગ્યે, Ultimate Multisite મુશ્કેલ કામ automate કરે છે જેથી તમે સરળતાથી requirements પૂરી કરી શકો.
Ultimate Multisite installation દરમિયાન, wizard આપોઆપ sunrise.php ને designated folder માં copy અને install કરશે. આ step પૂરું થાય ત્યાં સુધી wizard તમને આગળ વધવા નહીં દે.
આનો અર્થ એ છે કે એકવાર Ultimate Multisite installation wizard તમારું network setup કરી લે, પછી તમે તરત જ custom domain mapping શરૂ કરી શકો છો.
નોંધો કે Ultimate Multisite માં domain mapping ફરજિયાત નથી. તમારી પાસે WordPress Multisite નું native domain mapping function અથવા કોઈપણ અન્ય domain mapping solution વાપરવાનો વિકલ્પ છે.
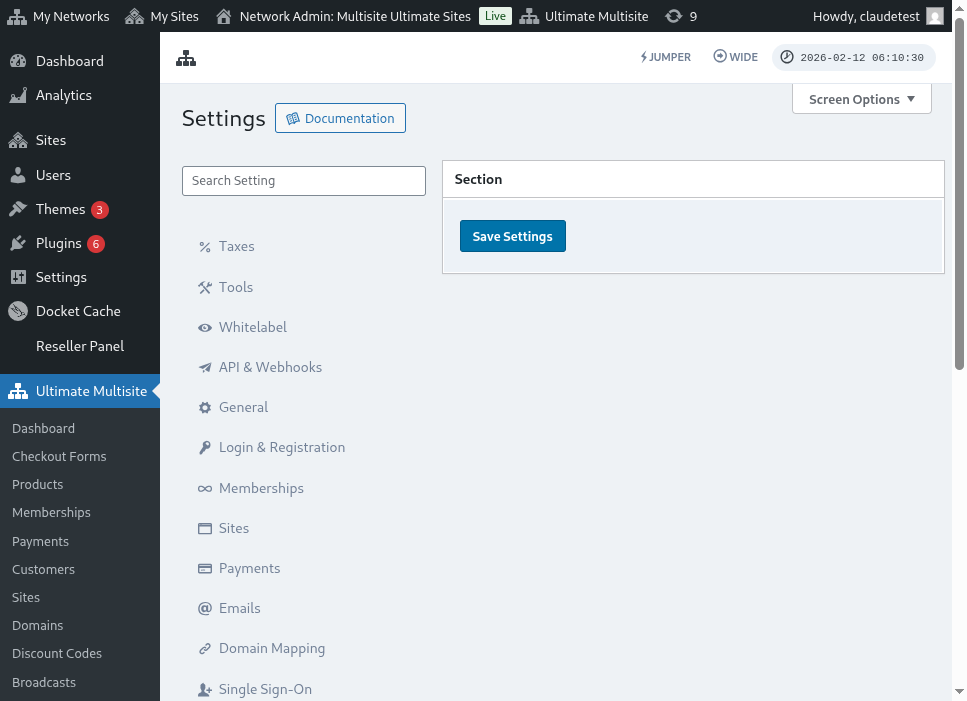
જો તમારે અન્ય domain mapping solutions માટે Ultimate Multisite domain mapping disable કરવું હોય, તો તમે Ultimate Multisite > Settings > Domain Mapping હેઠળ આ feature disable કરી શકો છો.
આ option ની નીચે, તમે Force Admin Redirect option પણ જોઈ શકો છો. આ option તમને control કરવા દે છે કે તમારા customers તેમના admin dashboard ને તેમના custom domain અને subdomain બંને પર access કરી શકશે કે ફક્ત એક પર.
જો તમે Force redirect to mapped domain select કરો, તો તમારા customers ફક્ત તેમના custom domains પર જ તેમના admin dashboard access કરી શકશે.
Force redirect to network domain option બરાબર ઊલટું કરશે - તમારા customers ફક્ત તેમના subdomain પર જ dashboards access કરી શકશે, ભલે તેઓ custom domains પર sign in કરવાનો પ્રયાસ કરે.
અને Allow access to the admin by both mapped domain and network domain option તેમને subdomain અને custom domain બંને પર admin dashboards access કરવા દે છે.
Custom domain map કર�વાની બે રીતો છે. પહેલી છે super admin તરીકે તમારા network admin dashboard થી domain name mapping કરવું અને બીજી છે account page હેઠળ subsite admin dashboard દ્વારા.
પરંતુ તમે તમારા network ની કોઈ subsite સાથે custom domain map કરવાનું શરૂ કરો તે પહેલાં, તમારે ખાતરી કરવી પડશે કે domain name ની DNS settings યોગ્ય રીતે configured છે.
Domain DNS settings યોગ્ય રીતે configured છે તેની ખાતરી કરવી
Mapping કામ કરે તે માટે, તમારે ખાતરી કરવી પડશે કે તમે map કરવા માંગો છો તે domain તમારા Network ના IP address તરફ point કરે છે. નોંધો કે તમારે Network IP address જોઈએ - જે domain પર Ultimate Multisite installed છે તેનો IP address - નહીં કે તમે map કરવા માંગો છો તે custom domain નો IP address. કોઈ specific domain નો IP address શોધવા માટે, અમે Site24x7 પર જવાનું સૂચવીએ છીએ, ઉદાહરણ તરીકે.
Domain ને યોગ્ય રીતે map કરવા માટે, તમારે તમારી DNS configuration પર તે IP address તરફ point કરતો A RECORD add કરવો પડશે. DNS management વિવિધ domain registrars વચ્ચે ઘણું અલગ હોય છે, પરંતુ જો તમે "Creating A Record on XXXX" search કરો જ્યાં XXXX તમારો domain registrar છે (ઉદા.: "Creating A Record on GoDaddy") તો online ઘણા tutorials મળશે.
જો તમને આ કામ કરાવવામાં મુશ્કેલી આવે, તમારા domain registrar support નો સંપર્ક કરો અને તેઓ આ ભાગમાં તમને મદદ કરી શકશે.
જો તમે તમારા clients ને પોતાના domains map કરવાની મંજૂરી આપવાની યોજના ધરાવો છો, તો તેમને આ ભાગનું કામ જાતે કરવું પડશે. જો તેઓ A Record create કરવામાં અસમર્થ હોય તો તેમને તેમના registrar support system તરફ point કરો.
Super Admin તરીકે custom domain name Mapping કરવું
જ��્યારે તમે તમારા network પર super admin તરીકે logged in હો, ત્યારે તમે Ultimate Multisite > Domains હેઠળ જઈને સરળતાથી custom domain names add અને manage કરી શકો છો.
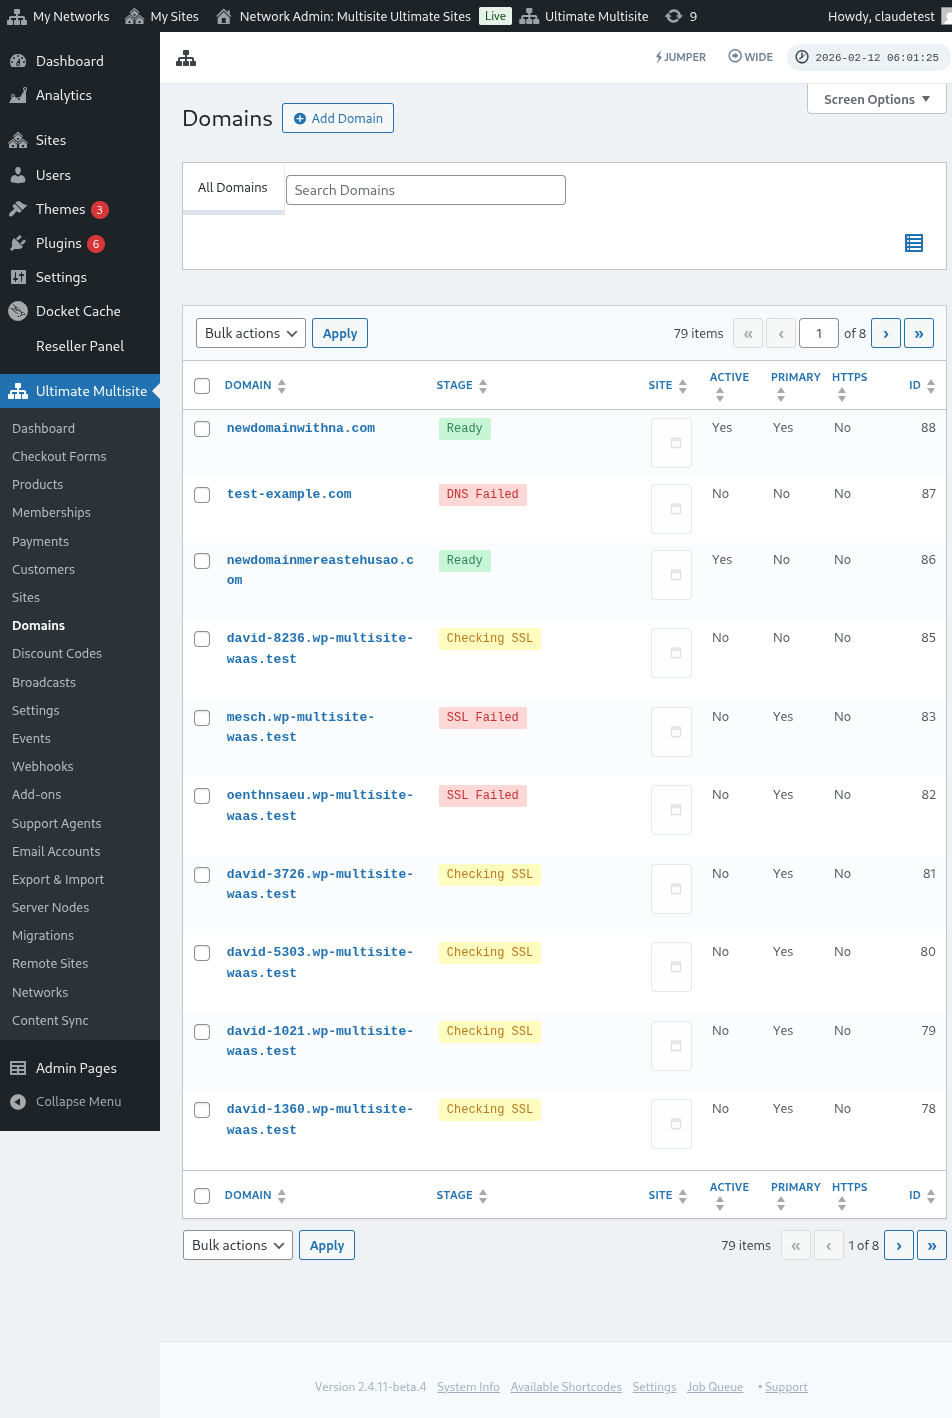
આ page પર, તમે ટોચ પર Add Domain button પર click કરી શકો છો અને આ એક modal window લાવશે જ્યાં તમે custom domain name, તમે custom domain name apply કરવા માંગો છો તે subsite, અને તમે તેને primary domain name તરીકે set કરવા માંગો છો કે નહીં તે decide કરી શકો છો (નોંધો કે તમે એક subsite સાથે multiple domain names map કરી શકો છો).
બધી information ભર્યા પછી, તમે તળિયે Add Existing Domain button પર click કરી શકો છો.
આ custom domain ની DNS information verify અને fetch કરવાની process શરૂ કરશે. તમે page ના તળિયે એક log પણ જોશો જેથી તમે process follow કરી શકો. આ process પૂરી થવામાં થોડી minutes લાગી શકે છે.
જો બધું યોગ્ય રીતે set up હોય તો Stage અથવા status Checking DNS થી Ready માં બદલાવું જોઈએ.
જો તમે domain name પર click કરો, તો તમે તેની અંદર કેટલાક options જોઈ શકશો. ચાલો તેમના પર એક ઝડપી નજર નાખીએ:
Stage: આ domain ક્યા stage પર છે તે છે. જ્યારે તમે પહેલીવાર domain add કરો છો, ત્યારે તે કદાચ Checking DNS stage પર હશે. Process DNS entries check કરશે અને confirm કરશે કે તે correct છે. પછી, domain Checking SSL stage પર મૂકવામાં આવશે. Ultimate Multisite check કરશે કે domain માં SSL છે કે નહીં અને તમારા domain ને Ready અથવા Ready (without SSL) તરીકે categorize કરશે.
Site: આ domain સાથે associated subdomain. Mapped domain આ specific site નું content બતાવશે.
Active: Domain activate અથવા deactivate કરવા માટે તમે આ option on અથવા off toggle કરી શકો છો.
Is Primary Domain?: તમારા customers દરેક site માટે એક કરતાં વધુ mapped domain રાખી શકે છે. Specific site માટે આ primary domain છે કે નહીં તે select કરવા આ option વાપરો.
Is Secure?: ભલે Ultimate Multisite domain enable કરતાં પહેલાં check કરે છે કે domain માં SSL certificate છે કે નહીં, તમે manually select કરી શકો છો કે domain SSL certificate સાથે load કરવું કે વગર. નોંધો કે જો website માં SSL certificate નથી અને તમે તેને SSL સાથે force load કરવાનો પ્રયાસ કરો, તો તે errors આપી શકે છે.
Subsite user તરીકે custom domain name Mapping કરવું
Subsite administrators પણ તેમના subsite admin dashboard થી custom domain names map કરી શકે છે.
પહેલાં, તમારે ખાતરી કરવી પડશે કે તમે Domain mapping settings હેઠળ આ option enable કરો છો. નીચેનો screenshot જુઓ.
તમે Ultimate Multisite > Products પર Plan level અથવા product options હેઠળ પણ આ option set અથવા configure કરી શકો છો.
જ્યારે આમાંથી કોઈપણ options enabled હોય અને subsite user ને custom domain names map કરવાની મંજૂરી હોય, ત્યારે subsite user ને Account page હેઠળ Domains નામનો metabox દેખાવો જોઈએ.
User Add Domain button પર click કરી શકે છે અને તે કેટલીક instructions સાથે modal window લાવશે.
User પછી Next Step click કરી શકે છે અને custom domain name add કરવા આગળ વધી શકે છે. તેઓ એ પણ પસંદ કરી શકે છે કે આ primary domain હશે કે નહીં.
Add Domain પર click કરવાથી custom domain ની DNS information verify અને fetch કરવાની process શરૂ થશે.
Domain Syncing વિશે
Domain Syncing એ એક process છે જ્યાં Ultimate Multisite custom domain name ને તમારા hosting account માં add-on domain તરીકે add કરે છે domain mapping કામ કરે તે માટે.
જો તમારા hosting provider ને Ultimate Multisite domain mapping feature સાથે integration હોય તો Domain syncing આપોઆપ થાય છે. હાલમાં, આ hosting providers છે Runcloud, Closte, WP Engine, Gridpane, WPMU Dev, Cloudways, અને Cpanel.
તમારે Ultimate Multisite settings પર Integration tab હેઠળ આ integration activate કરવું પડશે.
નોંધો કે જો તમારો hosting provider ઉપર જણાવેલ providers માંથી એક નથી, તમારે manually domain name ને sync અથવા add કરવું પડશે તમા�રા hosting account માં.