Add advertising to customer sites
Ultimate Multisite: Ads, formerly called Ad Injector, adds network advertising to selected plans. You can use custom HTML or shortcodes, Google AdSense, or Google Ad Manager. A plan can use the network defaults or its own provider code.
The addon also supports a simple paid choice: customers can subscribe to an ad-supported plan and add a recurring product that removes the ads. You do not need to create a second plan.
Install and activate the addon
Install Ultimate Multisite: Ads from Ultimate Multisite > Addons, or upload the plugin ZIP from Plugins > Add New. Network activate it when the installation finishes.
Configure the network ad provider
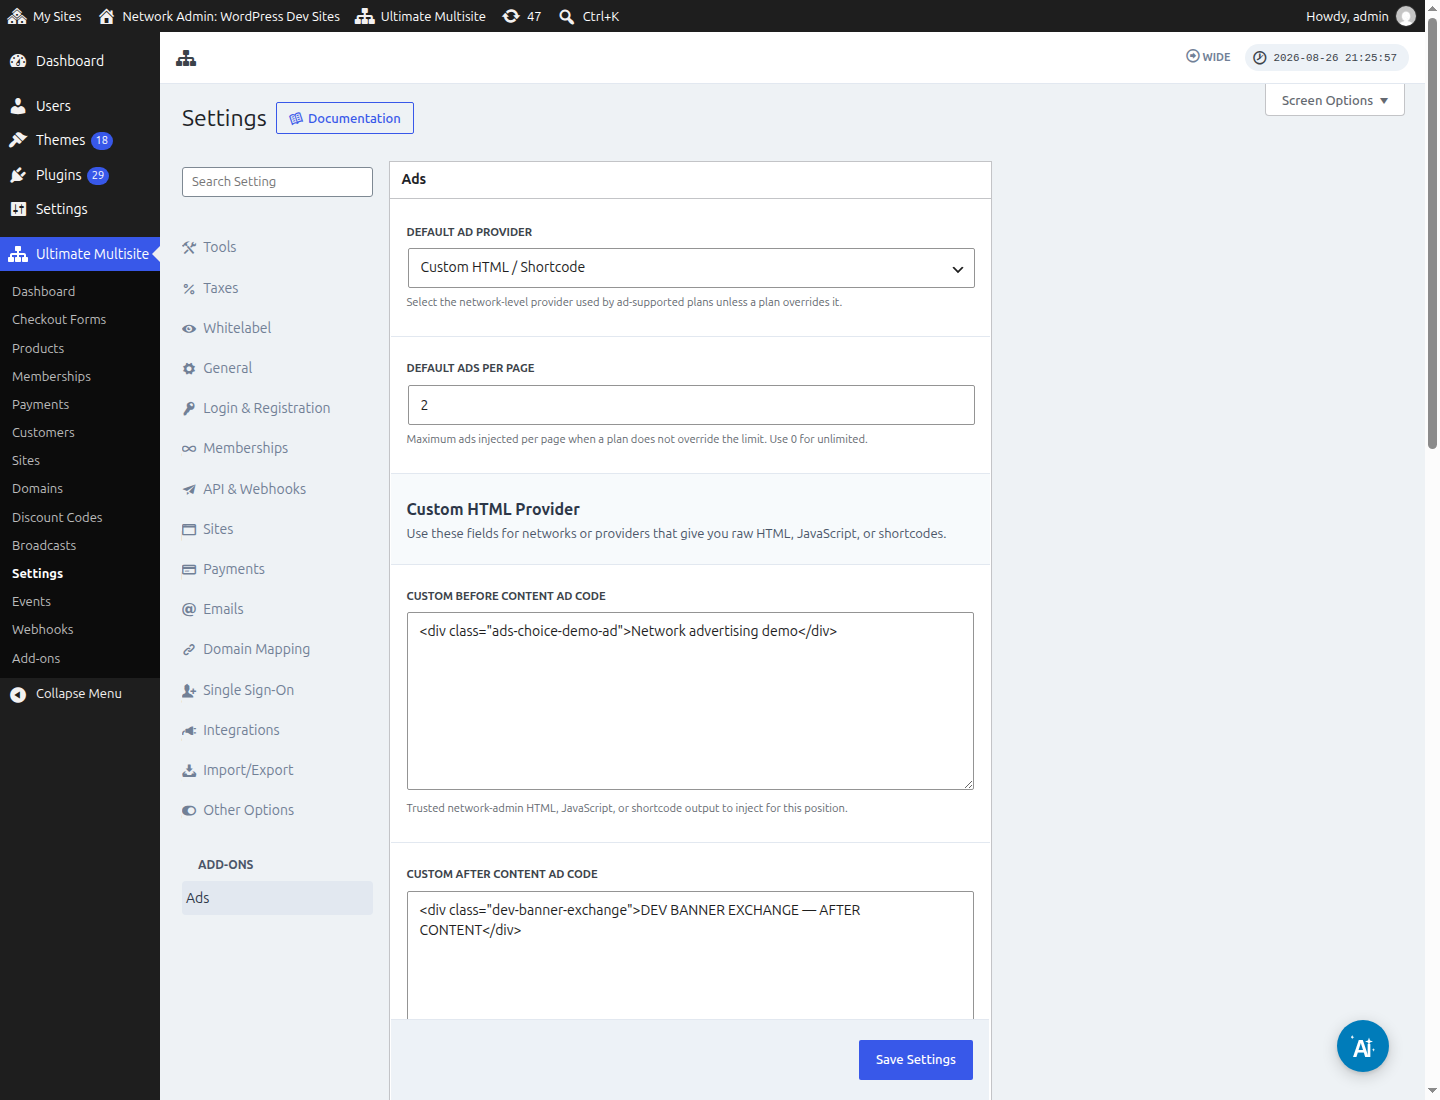
Go to Ultimate Multisite > Settings > Ads and select a provider:
- Custom HTML / Shortcode accepts trusted HTML, JavaScript, or a WordPress shortcode.
- Google AdSense uses your publisher and ad slot details.
- Google Ad Manager uses your network and ad unit details.
Set Ads per page to limit how many ads the addon can inject during one request. A value of 0 removes the limit.
Enable ads on a plan
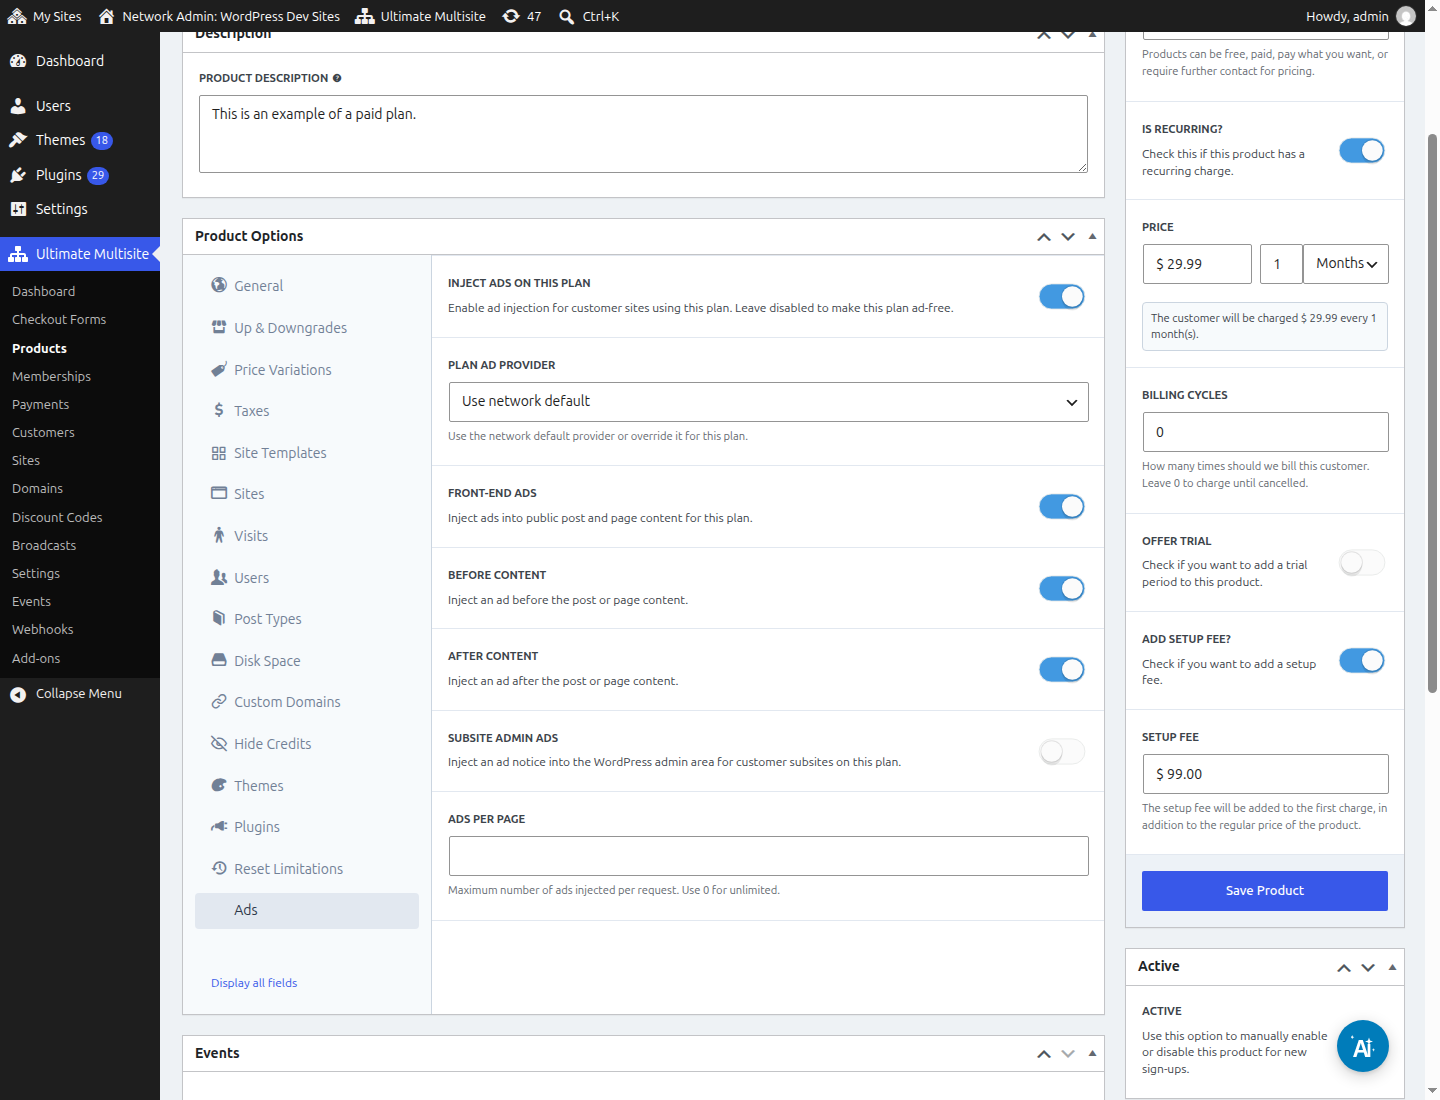
Edit the plan and open Product Options > Ads. Enable Inject ads on this plan, then choose the provider and placements. The available placements include public content before or after the post, and notices in the customer site's WordPress admin area.
Leave Inject ads on this plan disabled when the plan should always be ad-free.
Offer a paid "Remove Ads" choice
Use one recurring package or service product for the ad-free choice. Its billing interval should normally match the plan's billing interval.
- Go to Ultimate Multisite > Products > Add Product.
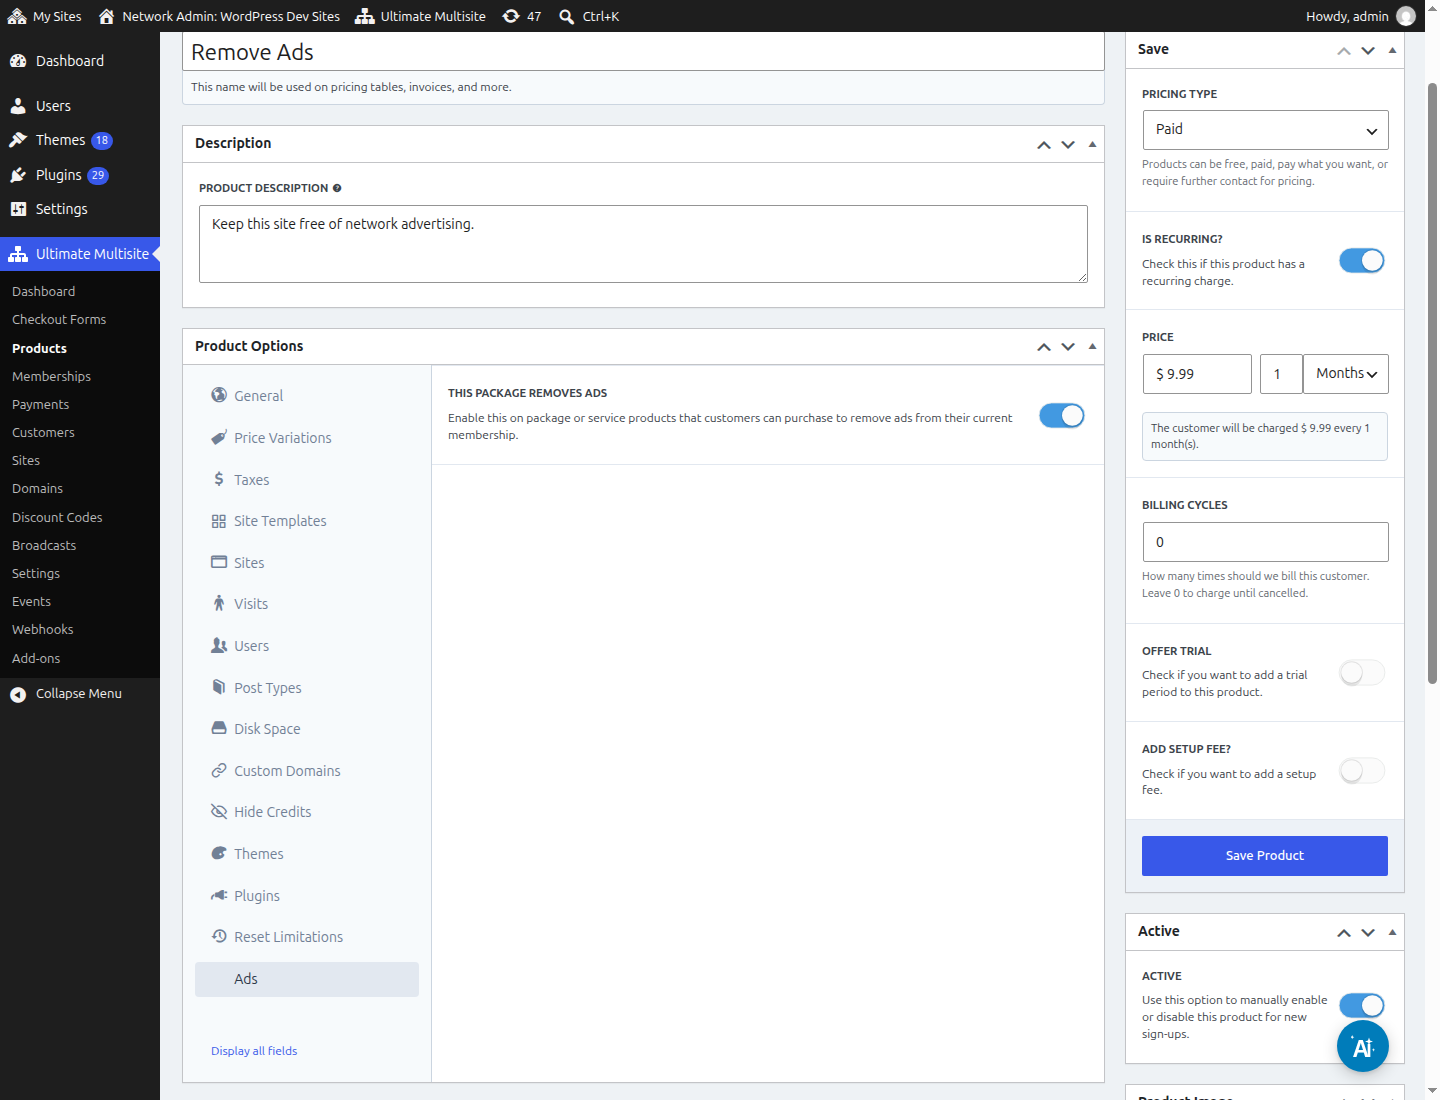
- Name the product Remove Ads, or use the label your customers will see.
- Set Product Type to Package or Service.
- Set the recurring price and billing interval.
- Open Product Options > Ads and enable This package removes ads.
- Save the product.
When this product is part of a membership, the addon skips all advertising for that membership.
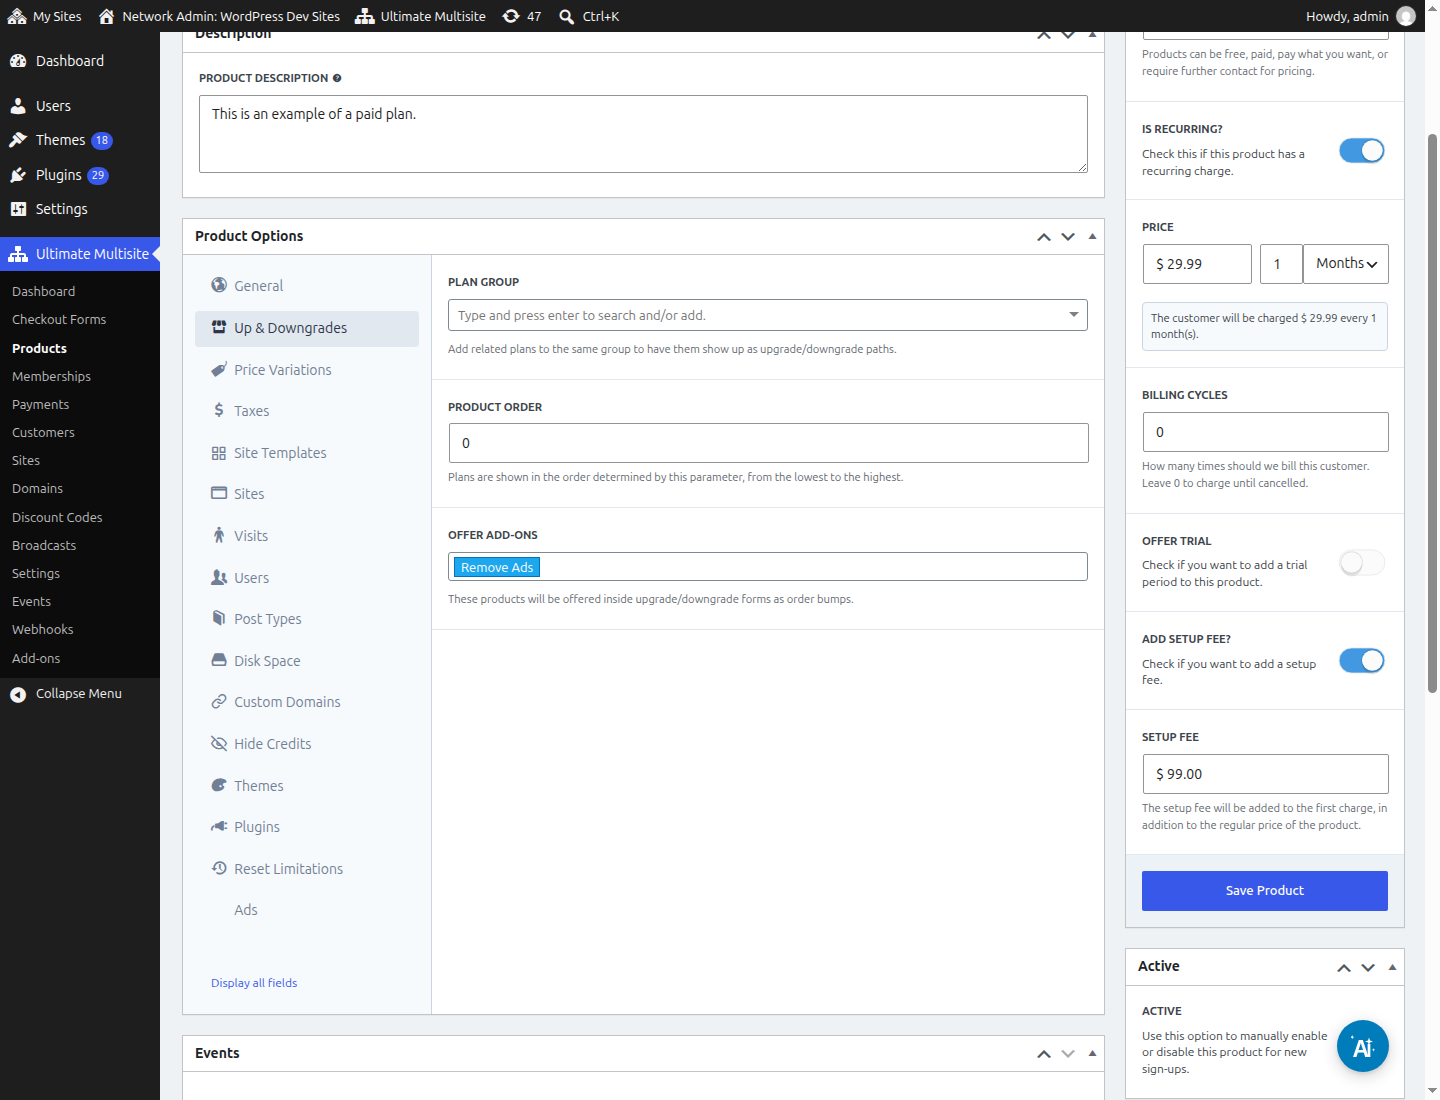
Next, edit the ad-supported plan. Open Product Options > Up & Downgrades and add the new product under Offer Add-ons.
Add the choice to checkout
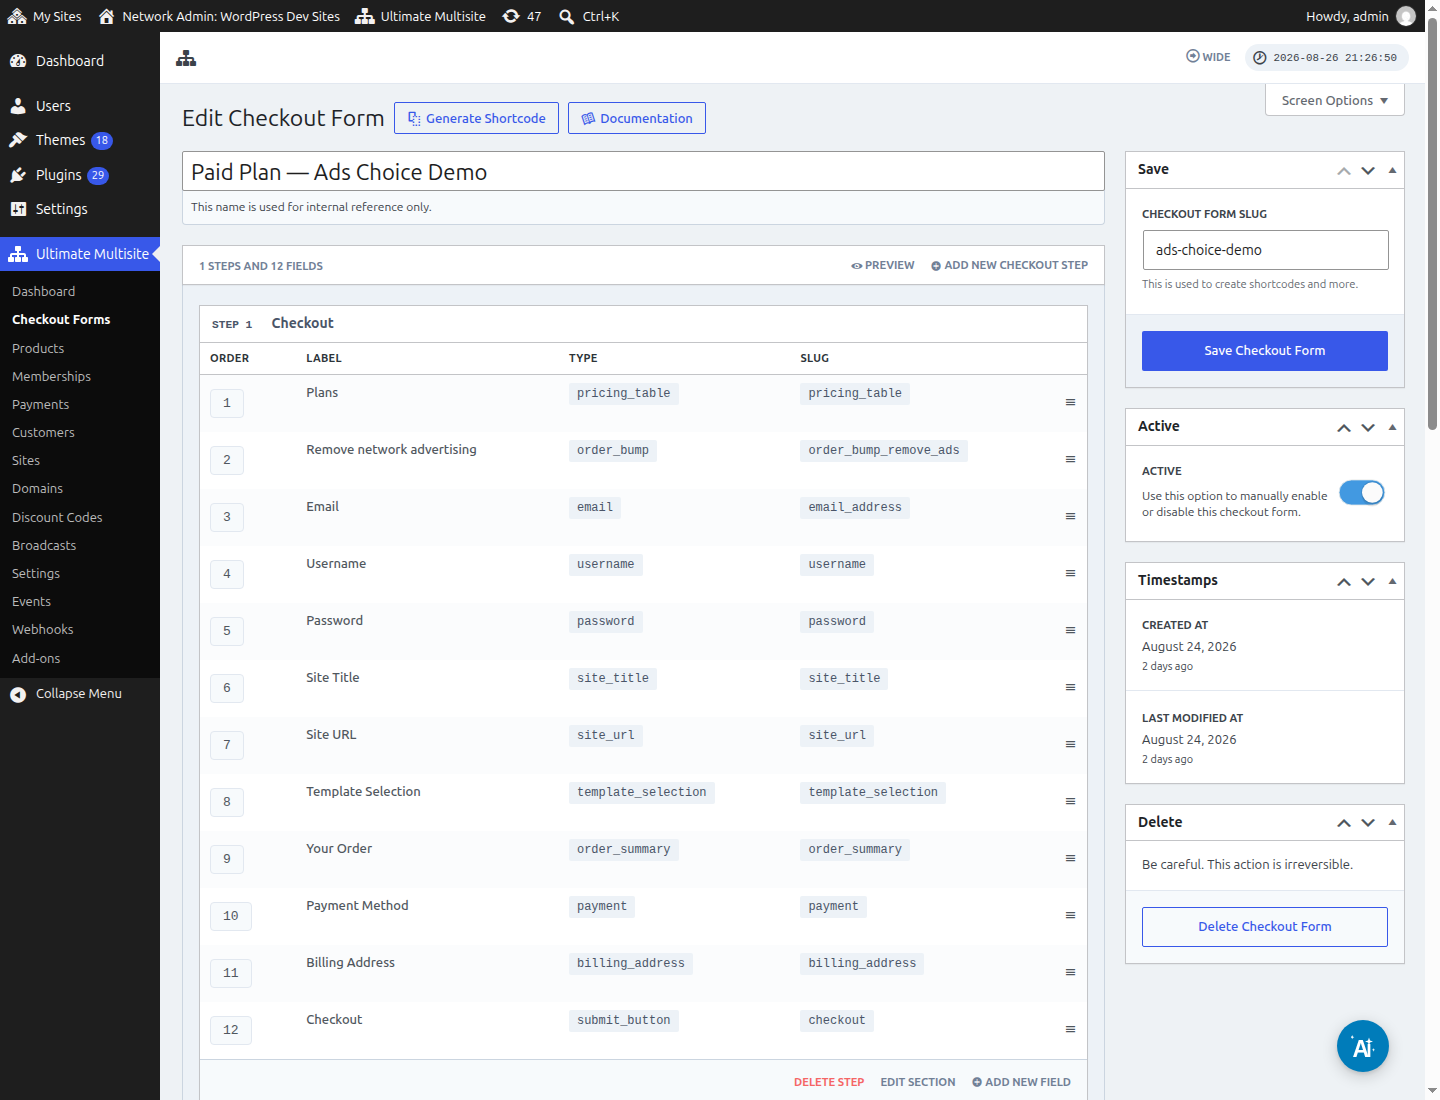
Edit the checkout form used by the plan and add an Order Bump field before the payment field. Select the Remove Ads product and use a direct customer-facing label, such as "Remove network advertising".
The checkout form should contain one pricing table for the base plan and one Order Bump field for the optional ad-removal product. This keeps the pricing table simple and lets the customer make the choice during checkout.
Test both outcomes
Complete two test checkouts before publishing the form:
- Buy the base plan without the add-on and confirm that ads appear in the enabled placements.
- Buy the same plan with Remove Ads selected and confirm that no frontend or subsite admin ads appear.
Also confirm that the order summary shows the add-on price and recurring interval. If the ad-free choice does not appear, check that the package is active, listed under the plan's Offer Add-ons, and selected in the checkout form's Order Bump field.